Create an API Integration
This guide walks you through creating an API integration in your SIPSIM dashboard. You'll get the credentials needed to authenticate with the API.
Step 1: Navigate to Integrations
- Log in to your SIPSIM account at app.sipsim.com
- Go to Settings > Integrations
- Find the API V2 card in the available integrations
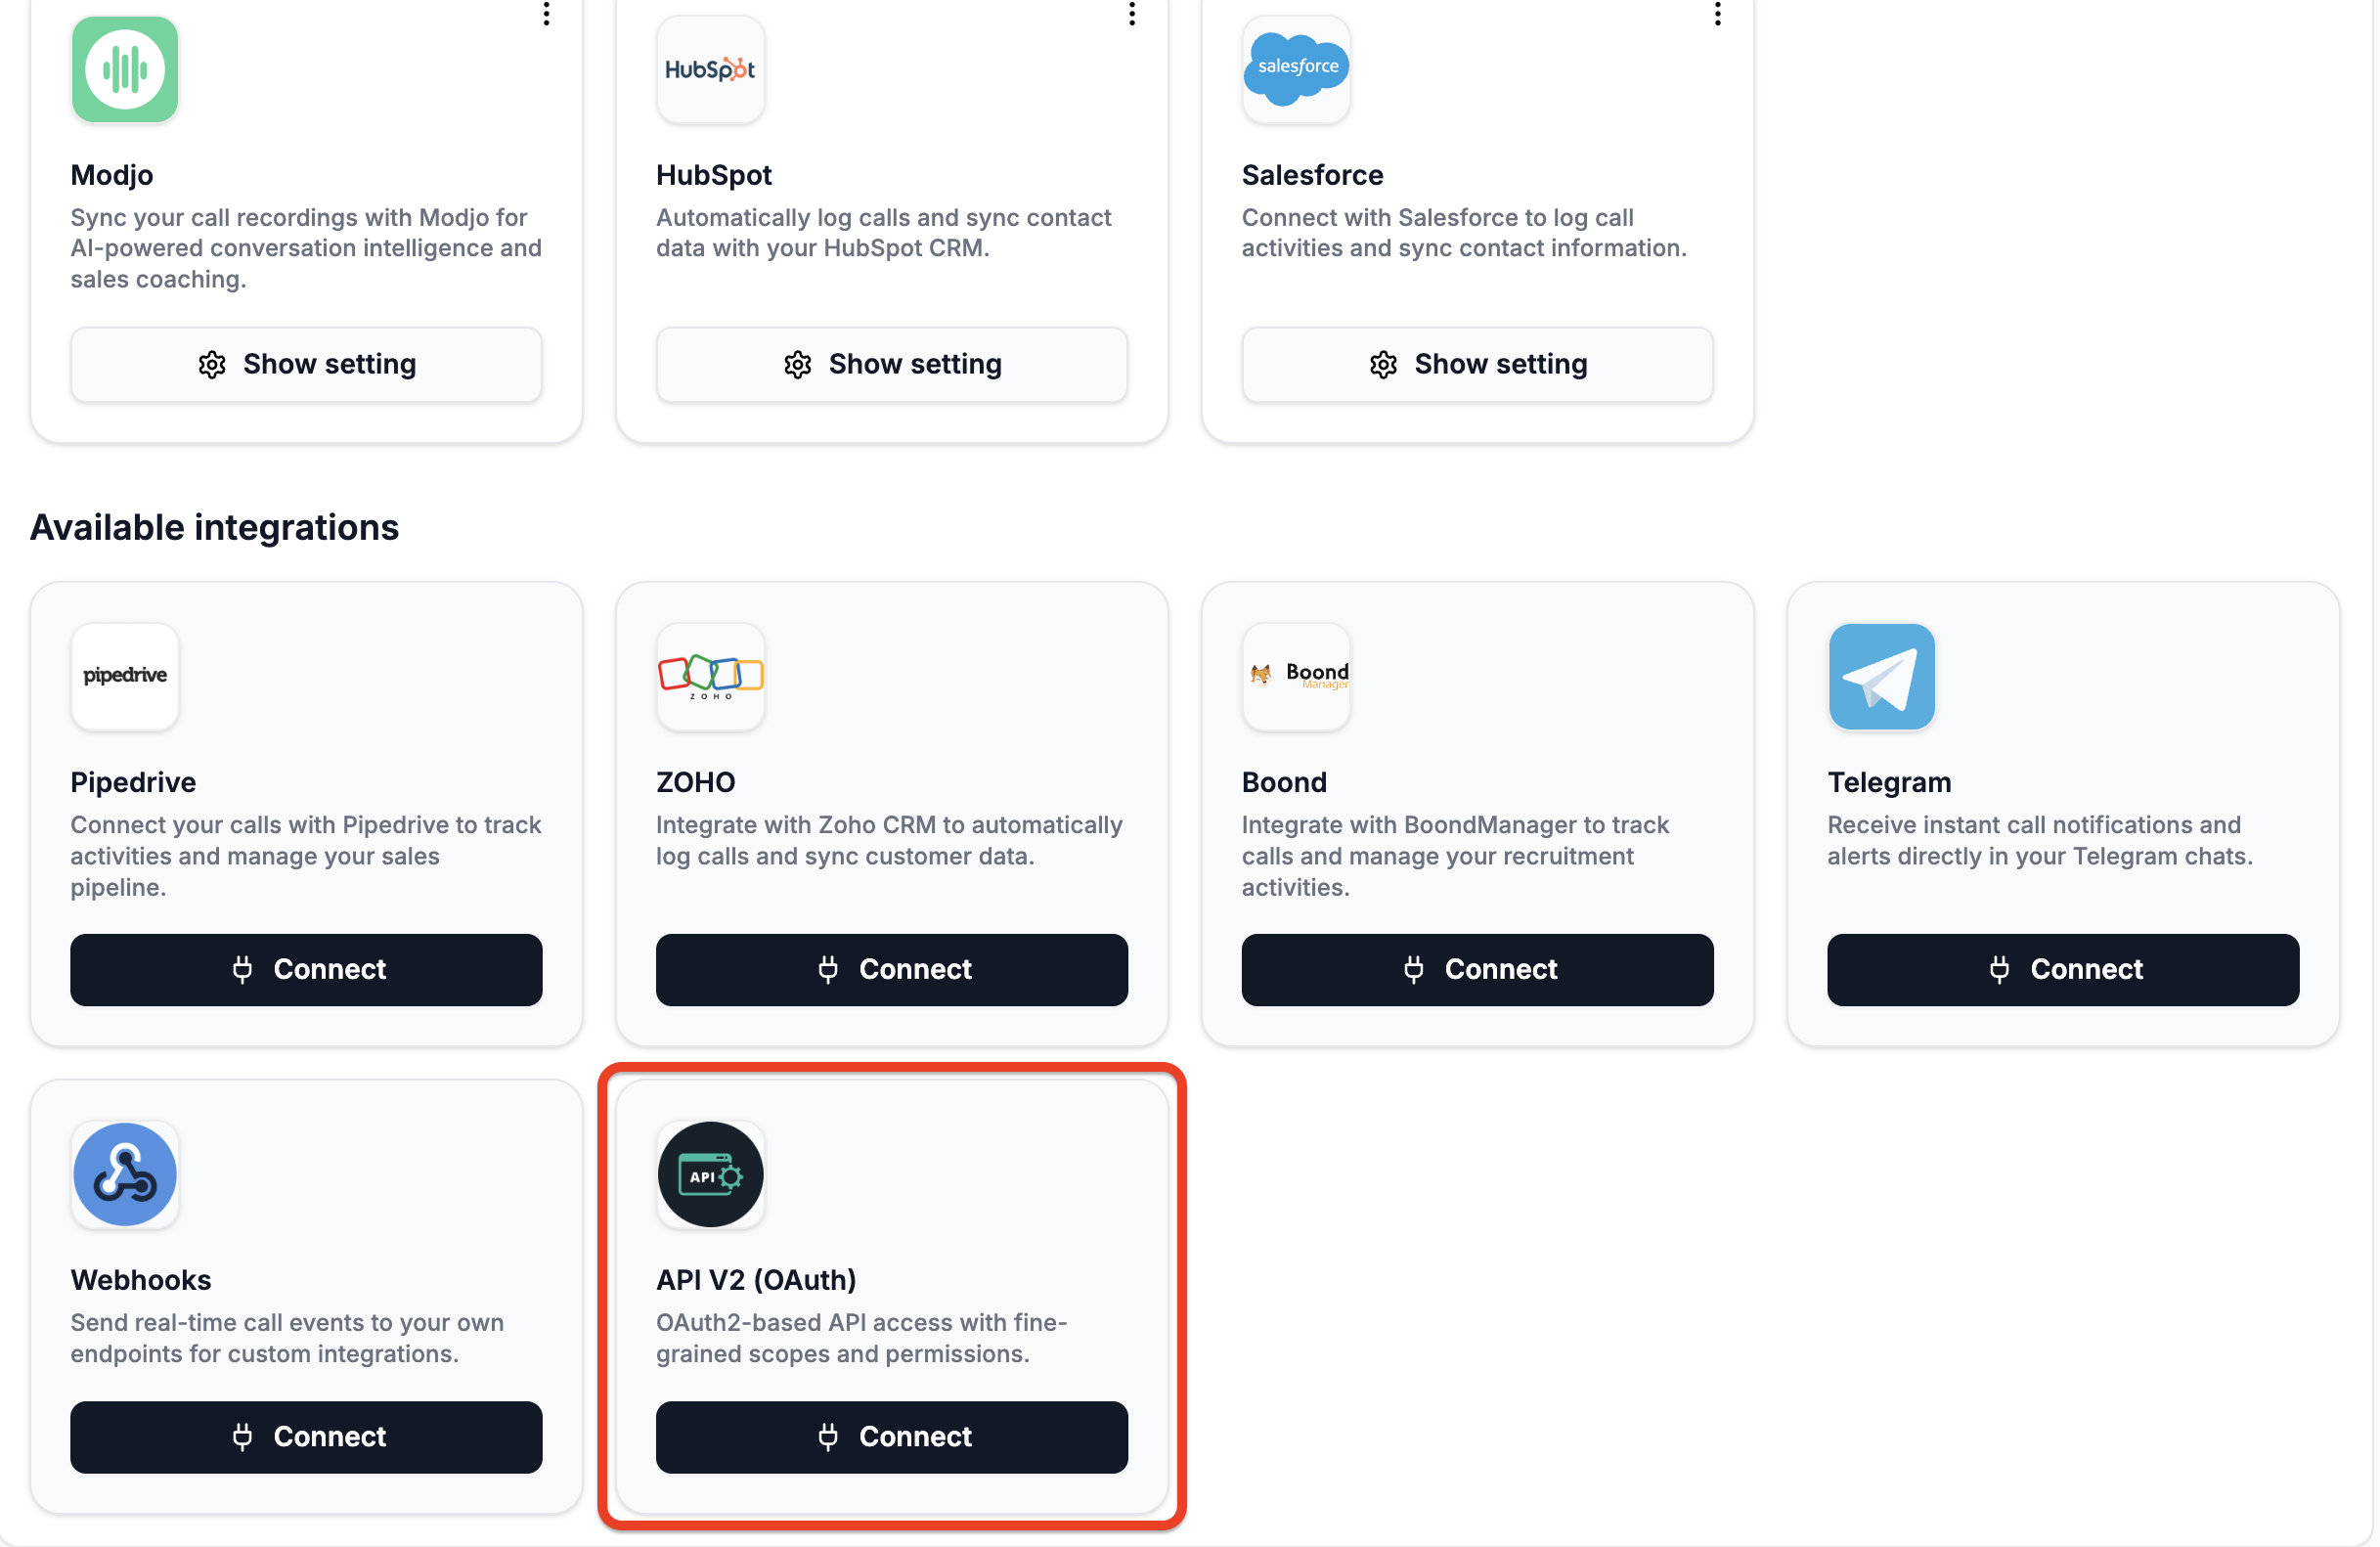
Step 2: Start Creating the Integration
Click the Connect button on the API V2 card. This opens the integration setup modal.
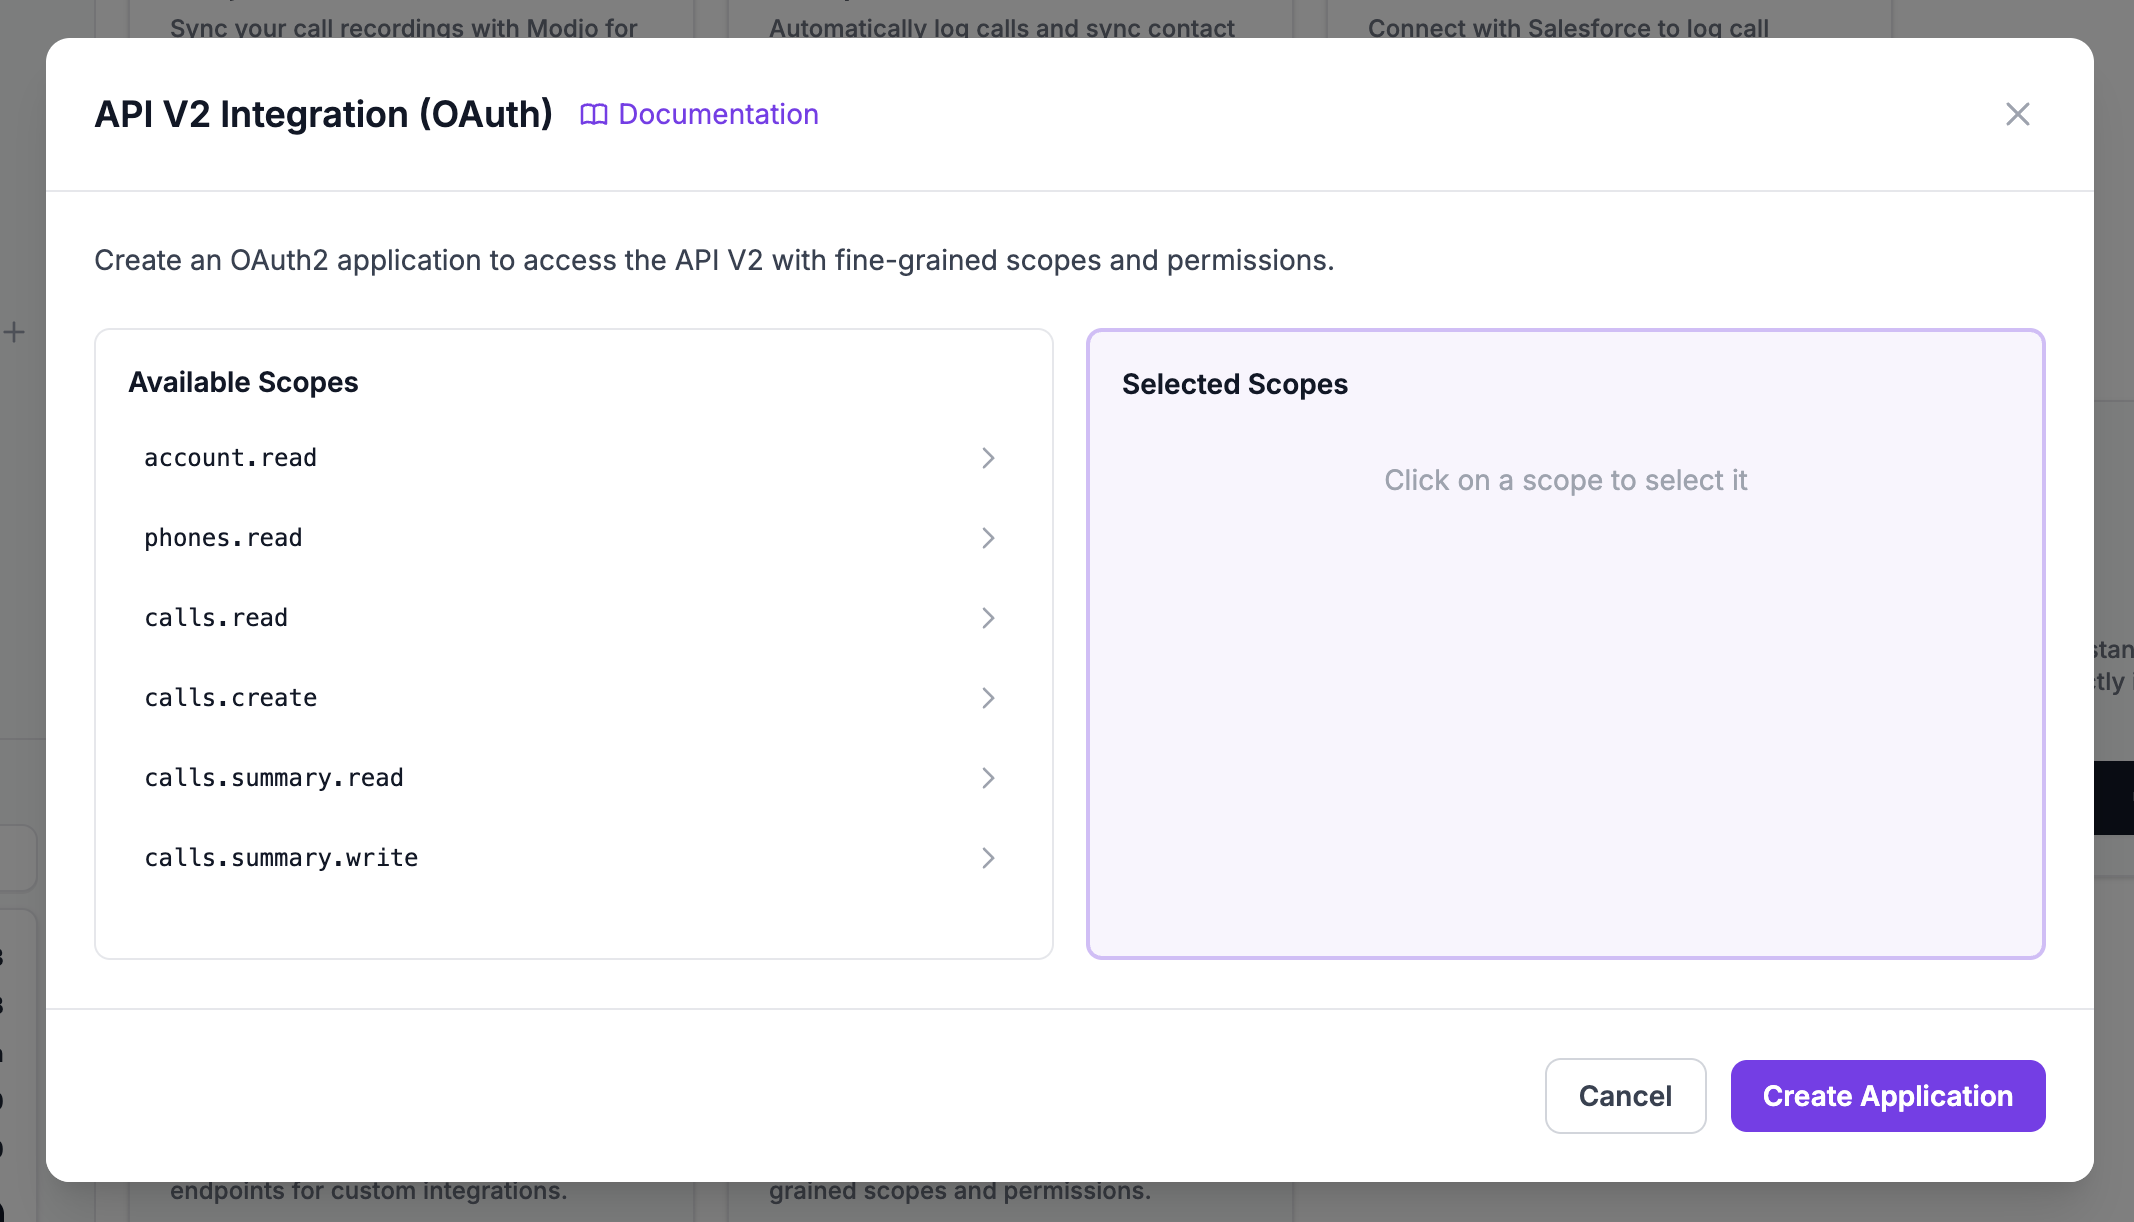
Step 3: Select Scopes
Scopes define what your integration can access. Select only the scopes your application needs — this follows the principle of least privilege.
Available Scopes
| Scope | Description |
|---|---|
account.read | Read account information |
phones.read | List phone lines and their configuration |
calls.read | Read call history and call details |
calls.create | Initiate outbound calls (click-to-call) |
calls.summary.read | Read AI-generated call summaries |
calls.summary.write | Generate and update call summaries |
calls.transcription.read | Read call transcriptions |
calls.transcription.write | Trigger call transcription |
calls.tags.write | Add and remove tags from calls |
groups.read | List groups |
groups.write | Create, update, and delete groups |
tags.read | List tags |
tags.write | Create, update, and delete tags |
settings.read | Read account settings |
settings.write | Update account settings |
Selecting Scopes
Use the two-column selector to choose your scopes:
- Left column: Available scopes
- Right column: Selected scopes
Click a scope to move it between columns.
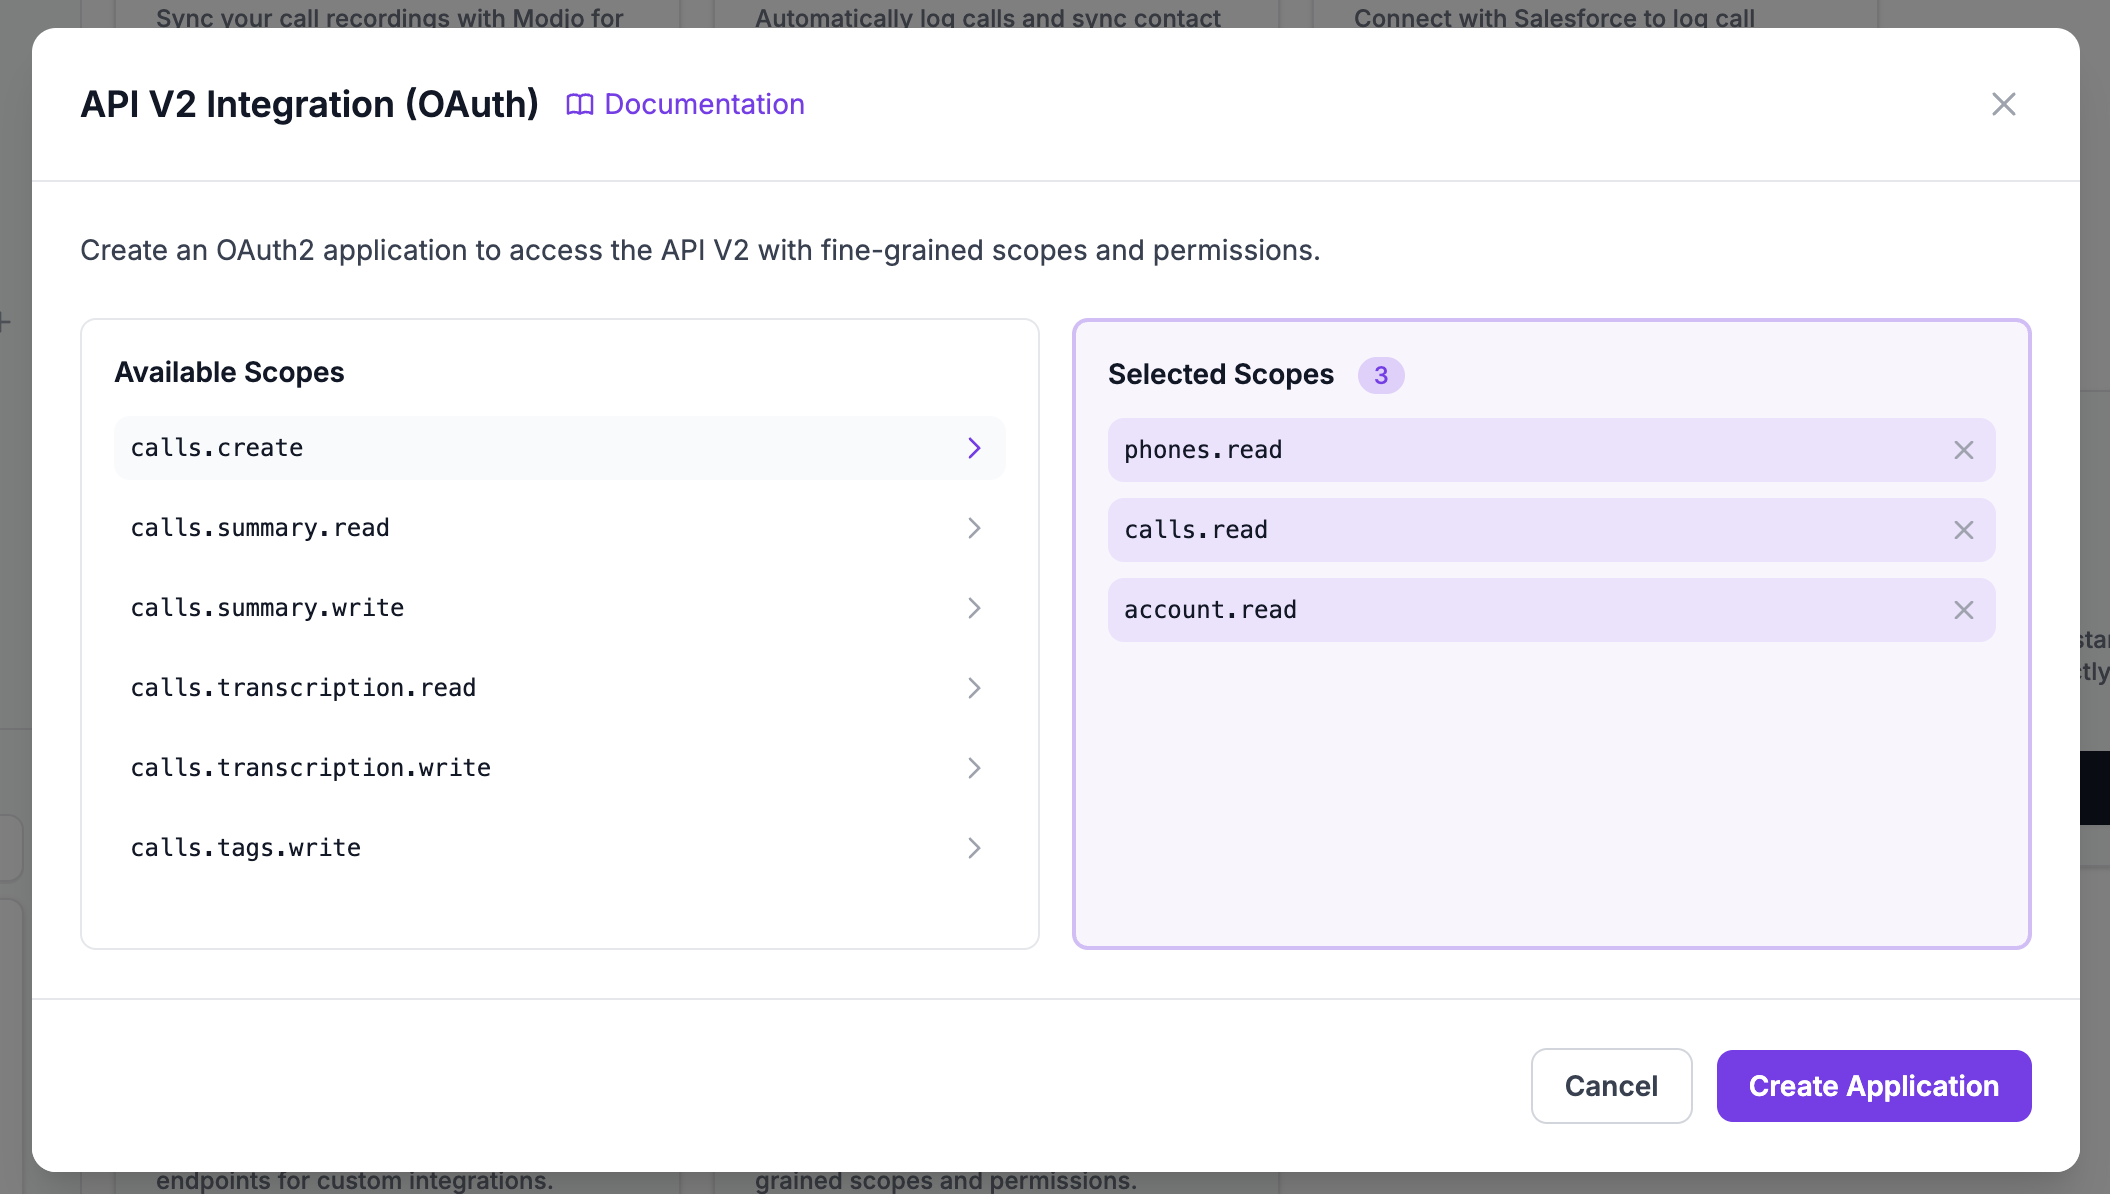
For most integrations, start with these scopes:
account.read— Verify the connectionphones.read— List available phone linescalls.read— Access call history
Add more scopes as needed for your use case.
Step 4: Create the Integration
Click Create to generate your API credentials.
Step 5: Save Your Credentials
After creation, you'll see your credentials:
- Client ID — Your application identifier (can be viewed anytime)
- Client Secret — Your secret key (shown only once!)
- Redirect URI — Pre-configured as
urn:ietf:wg:oauth:2.0:oob
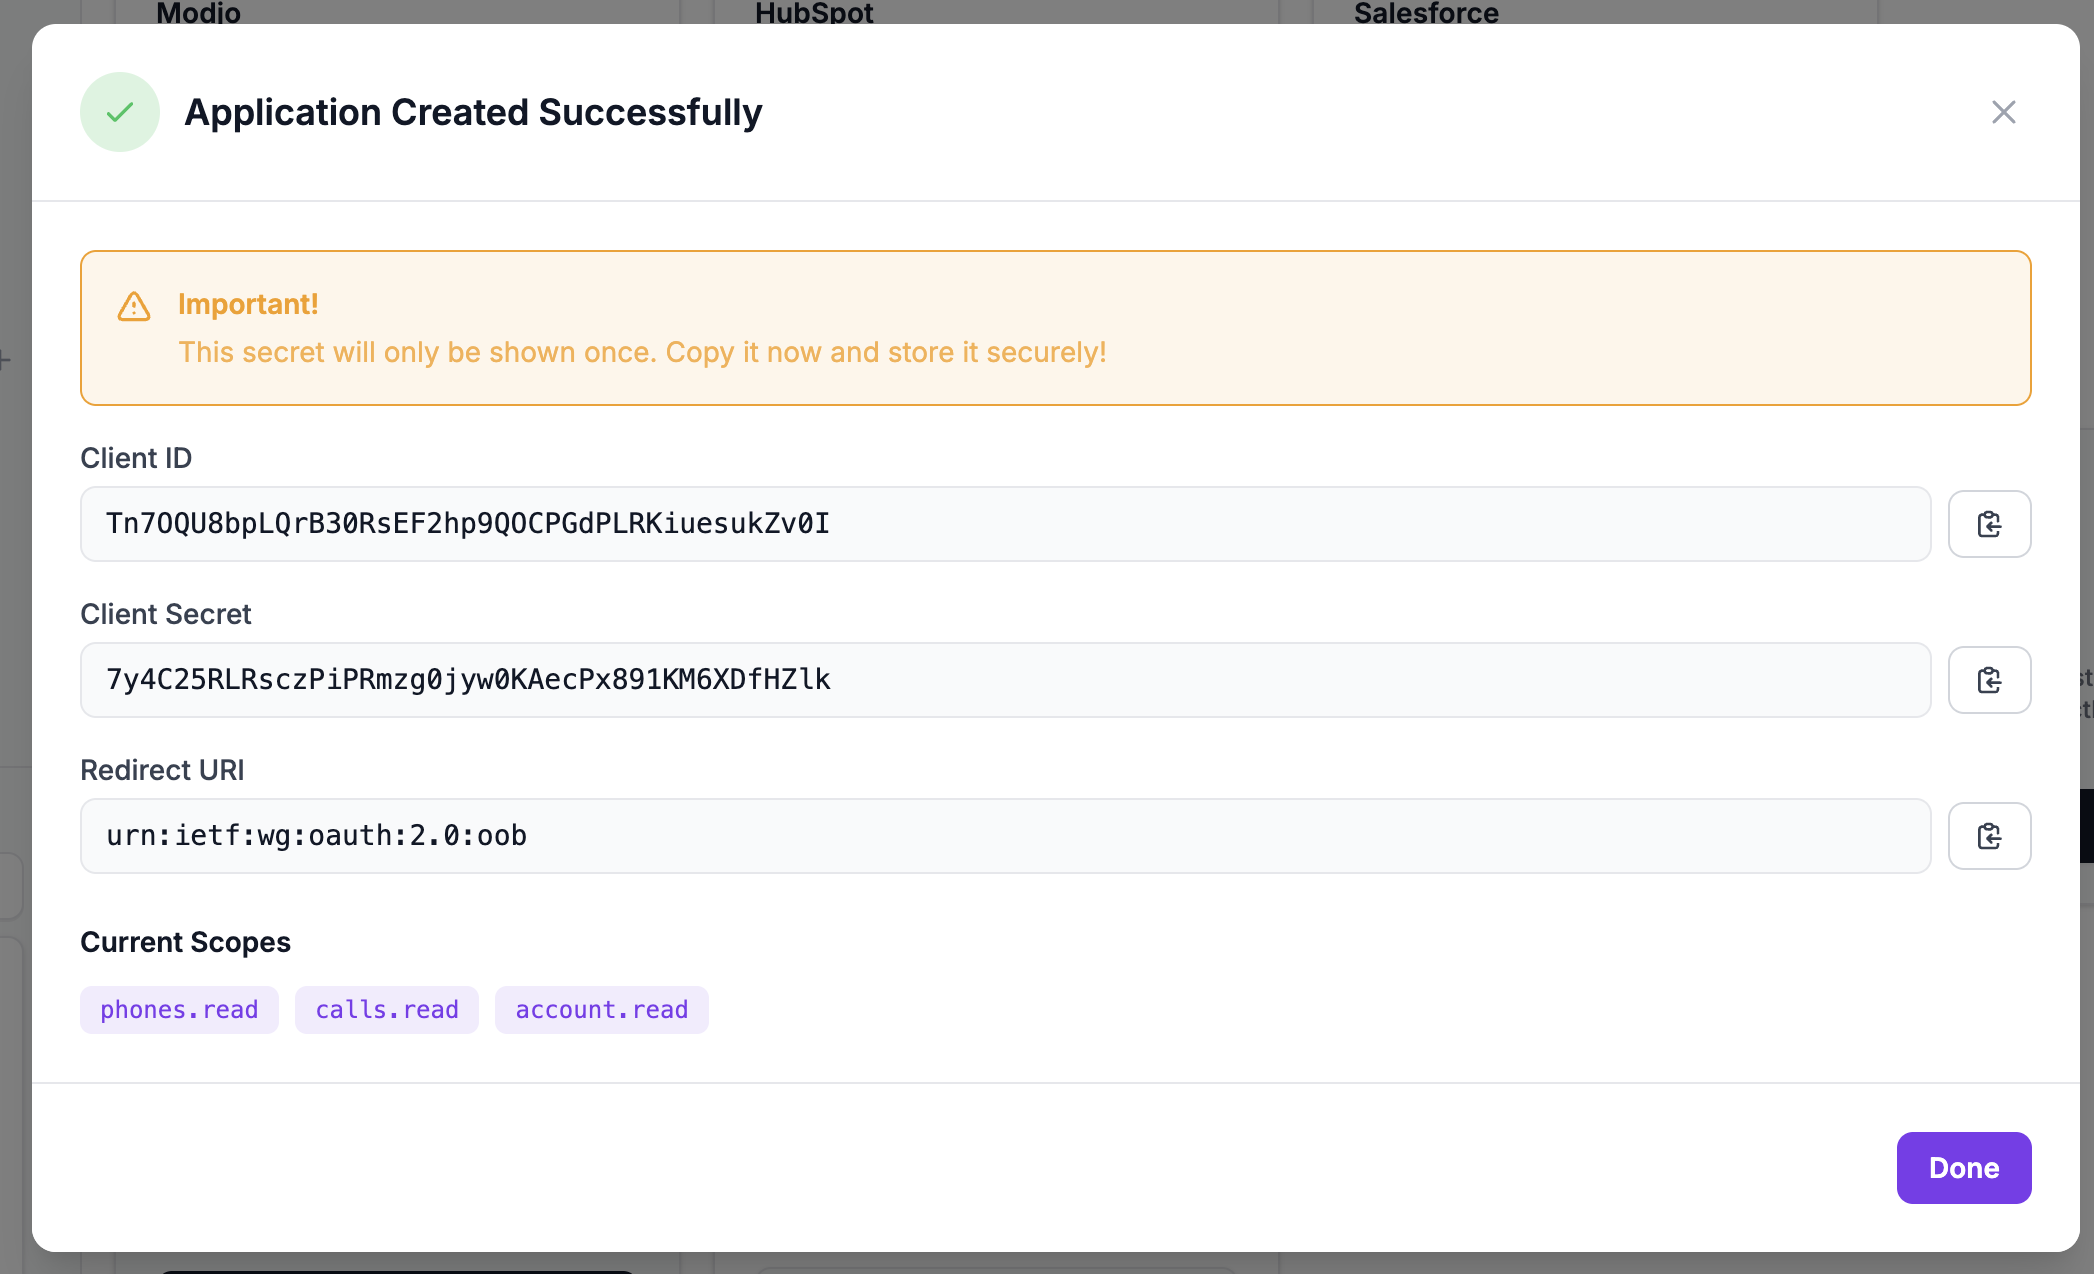
The Client Secret is only displayed once. Copy and store it securely before closing this modal.
If you lose your Client Secret, you'll need to delete this integration and create a new one.
Storing Credentials Securely
DO:
- Store credentials in environment variables
- Use a secrets manager (AWS Secrets Manager, HashiCorp Vault, etc.)
- Keep credentials out of source code
DON'T:
- Commit credentials to version control
- Share credentials in plain text
- Hardcode credentials in your application
# Example: Set credentials as environment variables
export SIPSIM_CLIENT_ID="your_client_id"
export SIPSIM_CLIENT_SECRET="your_client_secret"
Managing Your Integration
View Integration Settings
After creation, you can view your integration settings anytime:
- Go to Settings > Integrations
- Click Show Settings on the API V2 card
You'll see:
- Client ID (full value)
- Client Secret (masked for security)
- Current scopes
Edit Scopes
To change which scopes your integration has access to:
- Open your integration settings
- Click Edit Scopes
- Add or remove scopes as needed
- Click Update
Changing scopes may require you to re-authorize and get new access tokens.
Delete Integration
To remove your API integration:
- Open your integration settings
- Click Delete
- Confirm the deletion
Deleting the integration immediately revokes all access tokens and cannot be undone. Any applications using these credentials will stop working.
Next Steps
Now that you have your credentials, proceed to Authentication to learn how to get an access token.